
For the past few years, my father and I have grown a ton of
potatoes to store over the winter. We just dig them up and
plop them into a bucket in the basement, cleaning them off
when we want to use some but otherwise generally
ignoring them. Last year our haul lasted us until May.

I was curious what other veggies I could save so I hit Pinterest.
I knew carrots, when left out in the same fashion, just got
wrinkly and mushy but I found a few posts saying that
burying them in damp sand would keep them fresh.


Fast forward a couple months and we had a TON of carrots.
By the end of the season we had enough for two 5-gallon
buckets full so I picked and buried them.
I watered them once after that.
A few weeks later, I was picking the last of my uncles harvest
and brought home a few onions, not feeling up to cleaning
them, or knowing if I should, I dropped them on
top of the carrot sand.
My dad told me one day that the carrots were growing in the
bucket, and sure enough, green sprouts were poking up
through the sand, but the onions had rooted themselves too.
What a suprise!

I waited until they got a bit bigger and tried one of the sprouts,
yum! Perfectly spicy and crisp, just like a green onion.
A total of 5 weeks after tossed those onions in, I had a ton of
onion scapes, perfect to chop up and freeze.

We had actually figured it out, a sack of onions (about 8-10)
is right around $3, each of those onions, if planted,
would grow roughly 20 scapes. So for twice the price of a
bunch of green onions you could get 8x the food!
$7 Christmas Gallery Wall

This Christmas will be the first of many spent in Alabama.
The problem is,we have this entire house that
hasn’t been decorated since my fiance moved in
and we are having a party within a week of me
moving down there.
With the cost of moving and trying to survive on one
paycheck for a while, I needed a quick plan of decor
that didn’t cost a lot and was semi neutral to fit for a while
until we got enough saved to start actually decorating.
A gallery wall came to mind because it
packs a lot of design into a space quickly,
and when done right, is pretty inexpensive.
The first thing I did, like with any project, was scour Pinterest
trying to gather ideas. There I found my photos.


I printed the photos out, adjusting sizes as I went.
(You might notice a couple of the photos are a little off
from the files, my printer only wanted to print small
and everything had a red tinge to it,
It all worked out in the end though. 🙂 )
My frames were $1 a piece (love Dollar Tree!) so to keep
this project low-cost, I needed a quick,
easy way to make black mattes for my images.
Paint was my ultimate choice.

I carefully opened each frame
(with a knife to save my fingernails)
and painted a black edge, about 1.5″ all the way around the
cardboard backing of the frames, letting them dry completely.
I then taped the photos to the cardboard and carefully placed
them back into the frames, using that knife again to set the
metal back into place, and did a mockup of the layout on a
blank wall in my house.

The final setup will be on a wall of dark paneling
so the frames blend into the background,
leaving the photos to take center stage.

Chopping Herbs: The Easy Way
cut off woody stems and add to a jar or cup (glass works well) then take a pair of kitchen scissors and start snipping away! also works well for wet, freshly washed herbs
Neglect….
This always seems to happen, I have big news but work and life and daily grind take over and I never remember to post. I will get into the habit, I promise.
From July 3 to July 7, I took a trip to Alabama to see my long-distance boyfriend. I met his son and we had a very fun time seeing the sights (I even taught him how to make s’mores….the right way).
This week I will try to get some of the pictures up and next week I will post my film camera pics, but now, The News.

I got engaged!
I plan to be moving down to Alabama to live with him around Christmas-time so I have been making lists and checking the house twice, haha.
Now that my news is shared, back to my stew!

Thread.
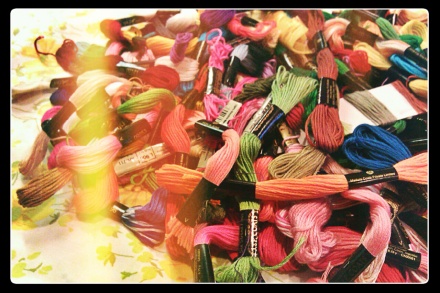
Last week, my grandma stopped over and gave me a bunch of embroidery floss and patterns. I’ve gotten quite the collection and realized that I needed someway to store these lengths of thread without ending up a tangled mess. I don’t live close to a craft store nor do I like to go along with the norm, so I found some clothespins lying around, realized that they are very cheap ($1 for at least 50 of them) and got started winding.

I wont use these clothespins for anything else so I wrote the color number directly onto the clothespin with a sharpie.
